|
Since I'm on spring break, I'll go on a "tangent" and share my kitchen cabinet makeover experience (had to throw some math in there for good "measure"...) Our kitchen cabinets were 15 years old, stained, builder-grade material, and in desperate need of a facelift. The stain was worn off in several spots. After experimenting with a few different types of chalk paint on the furniture in my classroom, I decided chalk paint was the medium I wanted to use on our kitchen cabinets. You have to decide what's best for you...do you have hardware on your cabinets? It will have to be removed before you paint. Do you want to paint the inside of your cabinet doors? Do you want to remove your doors and set up an assembly line, or leave your doors hanging? Since I had no hardware to deal with, and I decided not to paint the insides of my doors (maybe that will be a summer project), I left the doors hanging and just removed some of the kitchen drawers. I didn't even empty the cabinets or drawers. I just put a trash bag or drop cloth over them when I was painting nearby. My recommendation before starting this project: Talk to an expert. I went to three KC home shows and talked to the wonderful ladies from Restoration Emporium and got the most beneficial pointers (Tamara is amazing - look her up, she offers painting classes). I told her what I wanted to do, and she recommended these products (all Amy Howard, all from RE). Note: there is NO sanding required for these products.
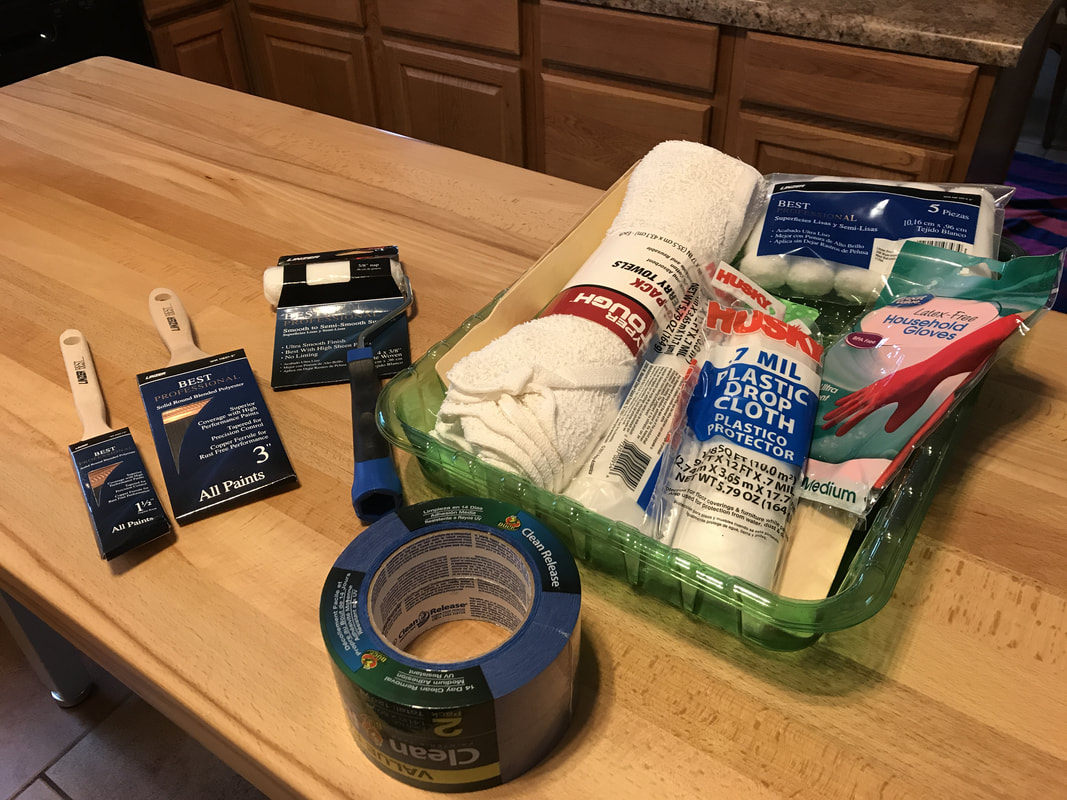
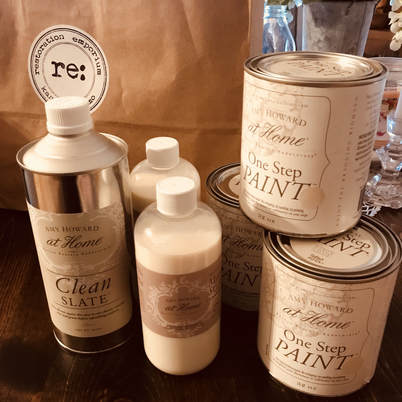 I bought these products for less than $150.00. I have a fairly big kitchen with a lot of cabinets and a large bar area, and this was enough for two coats of paint and two coats of sealer - just barely. TIP: Don't skimp on the paint. You get what you pay for with chalk paint. This paint was richer and thicker than most chalk paints I've used, and had the best coverage out of all of them. The other supplies that come in handy:
 Step 1: VACUUM. Everything. Whether you have pets or not, you do not want hair to end up in the paint. The same goes for crumbs, so wipe down the counters too. Even if you think your house is clean, do it again. Step 2: Clean the cabinets and trim with Clean Slate. This is the stinkiest part of the process, but by far the most important. Paint does not stick to surfaces that aren't clean. Make sure you have windows open so there is a cross-breeze, if possible. This product is amazing - I had 15 YEARS of caked-on greasiness and God only knows what else on the cabinets, and this stuff stripped it off. Use rags that you can throw away, and wear gloves. Saturate the rag and wipe on cabinets. You might have to scrub a little, but not much. Wipe off dirt with additional lint-free rags. 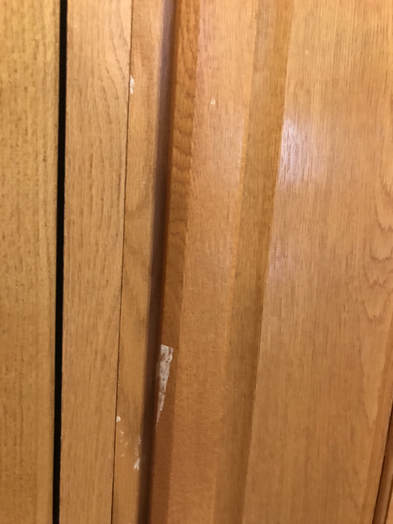 After the cabinets dry, you might notice white spots appearing in places. Don't freak out. I came to the conclusion that most of these can't be removed, even if you wipe them four or five times thinking you've missed some dirt. It just means the cleaner has stripped some tough grime away and this is the result. So, no turning back after you use the cleaner! Step 3: Tape. Even if you think you have a steady hand and can paint around objects...TAPE. I even taped the edges of my countertops, and I am so glad I did, because you never know when the brush will slip, especially after you've been working a while and your muscles are sore! I taped around the floor also, for the same reason. 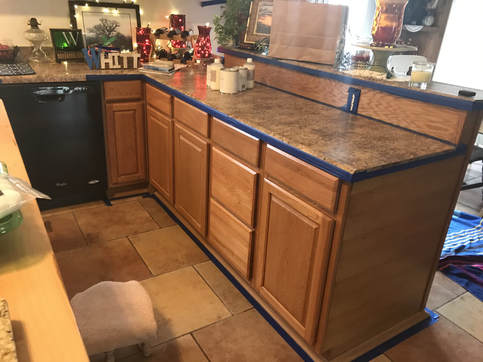 Step 4: Drop cloths - on floor and counters. I didn't move anything on the counters, just covered it up. Step 5: Paint. Two coats. Start at the bottom (but NOT the very bottom trim by the floor - it's extra dirty and you don't want that dirt to end up in your paint, which will end up on your cabinets). Tamara recommends starting the painting process with the bottom level of cabinets so you can get your technique perfected, because bottom row cabinets are less visible than the top row. Smart woman. I painted all of the cabinet trim first. Amy Howard One Step paint only takes 30 minutes to dry before it's ready for coat #2. By the time I worked my way around the kitchen, the first part of the trim had dried and I was ready to start coat #2. I rolled the paint on (get plenty of paint on the roller) and followed with long strokes of the 1.5-inch brush to smooth out the paint. You have to work quickly - I'm not joking when I say this paint dries in 30 minutes! 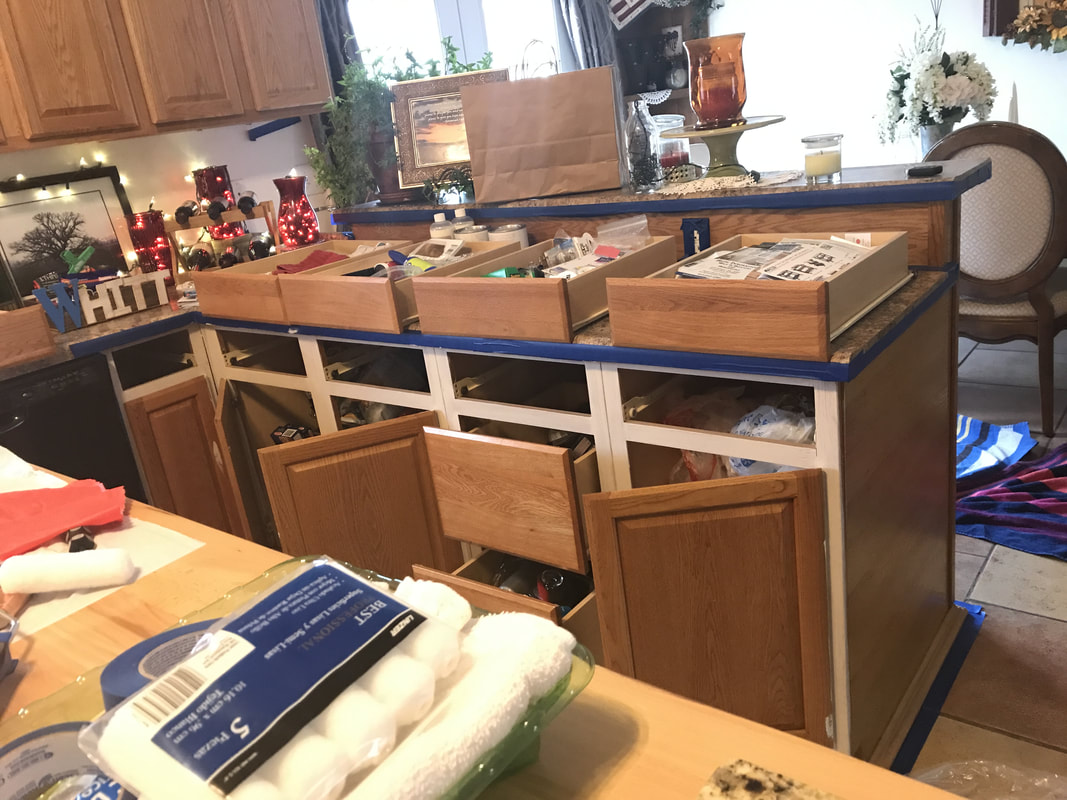 Step 6: Paint the cabinet and drawer faces. After some experimenting, the best route for me was to paint the edges of the doors and drawers first, and then leave them open, because the trim might look dry but you don't want to slam doors/drawers into it just yet. Since there are indentations in my cabinets, I painted those first with the brush, then used the roller on the flat panels and followed with the 3-inch brush in long, vertical strokes. Don't overwork the paint with the brush when following the roller - one stroke for each area will do, otherwise the paint will gum up. TIP: Watch for drips, especially in crevices - they're hard to remove if they sit for even a minute or two! TIP: Rinse brushes often. Don't let paint get gummed up, because it will flake off onto your cabinets. The great thing about this paint is it's water-based, so you can rinse brushes, squeeze the water out with a rag, and immediately use them again. TIP: Do NOT go back over the area you just painted if it looks like the paint isn't covering very well - it will just make the bare spot worse. Wait for the second coat. If the second coat doesn't catch it, you can do a touch-up after that coat dries.  Once I finished painting all the bottom pieces, I moved to the top cabinets, and lastly, the trim around the floor. Same process, trim first, then edges, then faces. Lather, rinse, repeat, for two coats of paint. Step 7: Matte Sealer, two coats. I chose sealer as opposed to wax, because (1) sealer repels fingerprints, dirt, grime, etc., and (2) you don't have to reapply the sealer - the wax is a different story. I used a cheap sealer on a table and chairs I painted for school, and it has held up tremendously well over everyday use, so that swayed my decision to opt for the sealer for this project. The sealer takes about an hour to dry between coats. I used the same process as before - trim, edges, faces. Roll, then brush. I used the same brushes but didn't have to rinse them as often as I did with the paint. Here's a video showing how to use the sealer. The directions on the bottle mention sanding between coats. I did not do that. 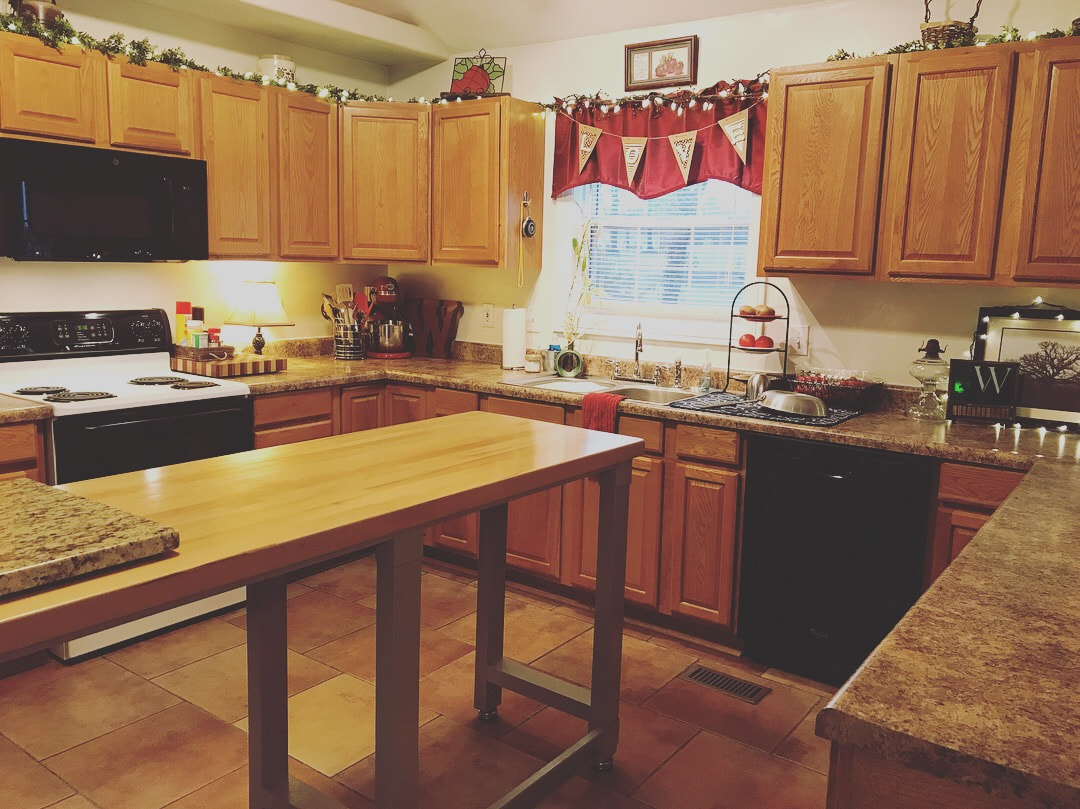 Kitchen before Kitchen before 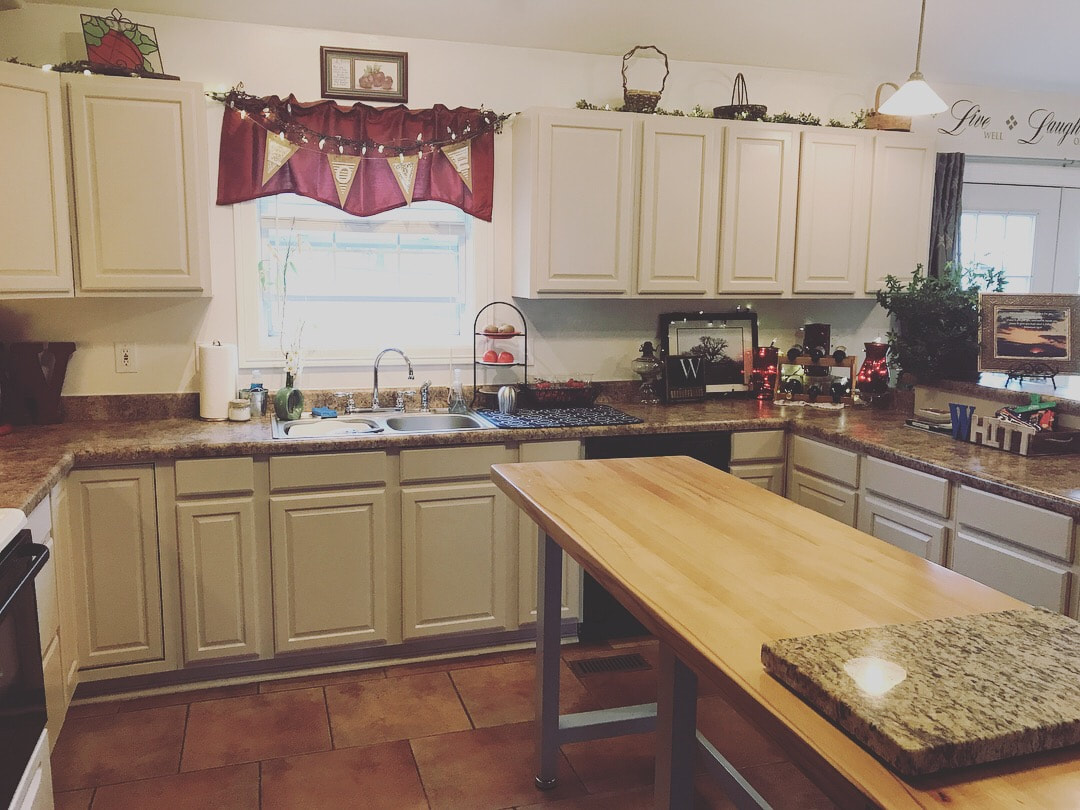 Kitchen after 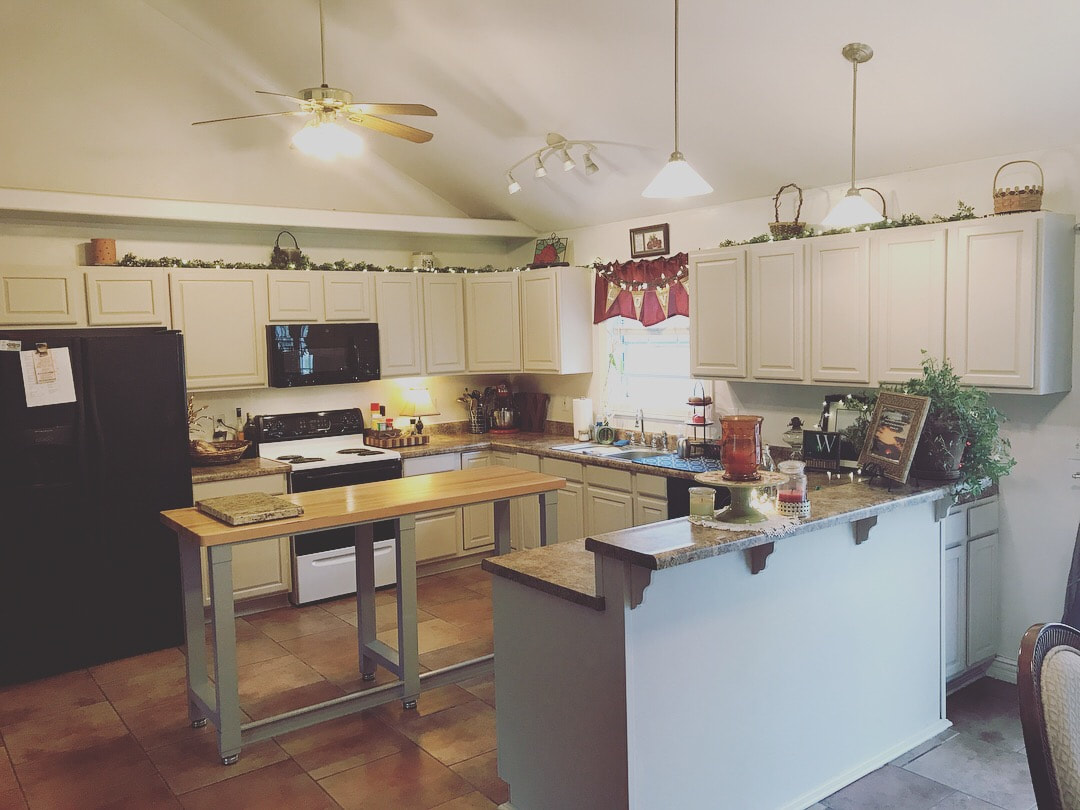 Kitchen after Step 8: Collapse into your favorite chair and admire your work! I got this project done in three days but put in some long hours.
The next project will be painting the kitchen and deciding on some kind of backsplash, and - if I win the lottery - counter tops. But for now, I rest. Because my body demands it. Happy painting! (It may seem daunting, but it's definitely worth it - I am so happy at how the cabinets turned out!!)
2 Comments
Carolyn Lindquist
3/29/2018 08:06:04 am
Thanks Sherri! I’m going to try this after we get baseball season started at the K! Will let you know how it goes! Where did you get your paint?
Sheri Whitt
3/29/2018 09:15:46 am
Thanks Carolyn! I bought my paint, cleaner, and sealer from Restoration Emporium in KC (West Bottoms). ACE Hardware also has it, not sure about color selection available there. Leave a Reply. |
Archives
January 2018
Categories
All
|
 RSS Feed
